 Relevancy and Engagement
agclassroom.org/in/
Lesson Plan
Water Ops for Growing
Grade Level
Purpose
Through project-based learning, students design and create a smart watering system for a small herb garden. Grades 6-8
Estimated Time
Materials Needed
Milestone 1: Entry Event
Milestone 2: Computational Thinking
- Computer
- Internet access
- Micro:bit (1 per group)
- Poster paper
- Colored markers
- Stickers
- Paper
Milestone 3: Product Design and Development
- 1 micro:bit with battery pack and batteries
- 2 long nails or silver
- 2 crocodile clips
- 1 micro servo + 3 male-to-croc clips
- 1 ice cream wooden stick
- 2 elastics
- 1 clear tape roll
- 1 straw
- 1 pair of scissors
- Sticky notes
Milestone 4: Final Presentation
- Cameras, photo and/or video recording equipment
- Presentation Rubric
Vocabulary
computational thinking: considering a problem in a way that a computer can help us to solve it
innovation: a new method, idea, or product
microcontroller : a tiny computer that makes coding tangible and promotes digital creativity
prototype: an original model on which something is patterned
Background Agricultural Connections
| Water Ops for Growing is a Project-Based Learning (PBL) plan. PBL is a teaching method in which students gain knowledge and skills by working for an extended period of time to investigate and respond to an authentic, engaging, and complex question, problem, or challenge.1 |

Essential Elements of PBL
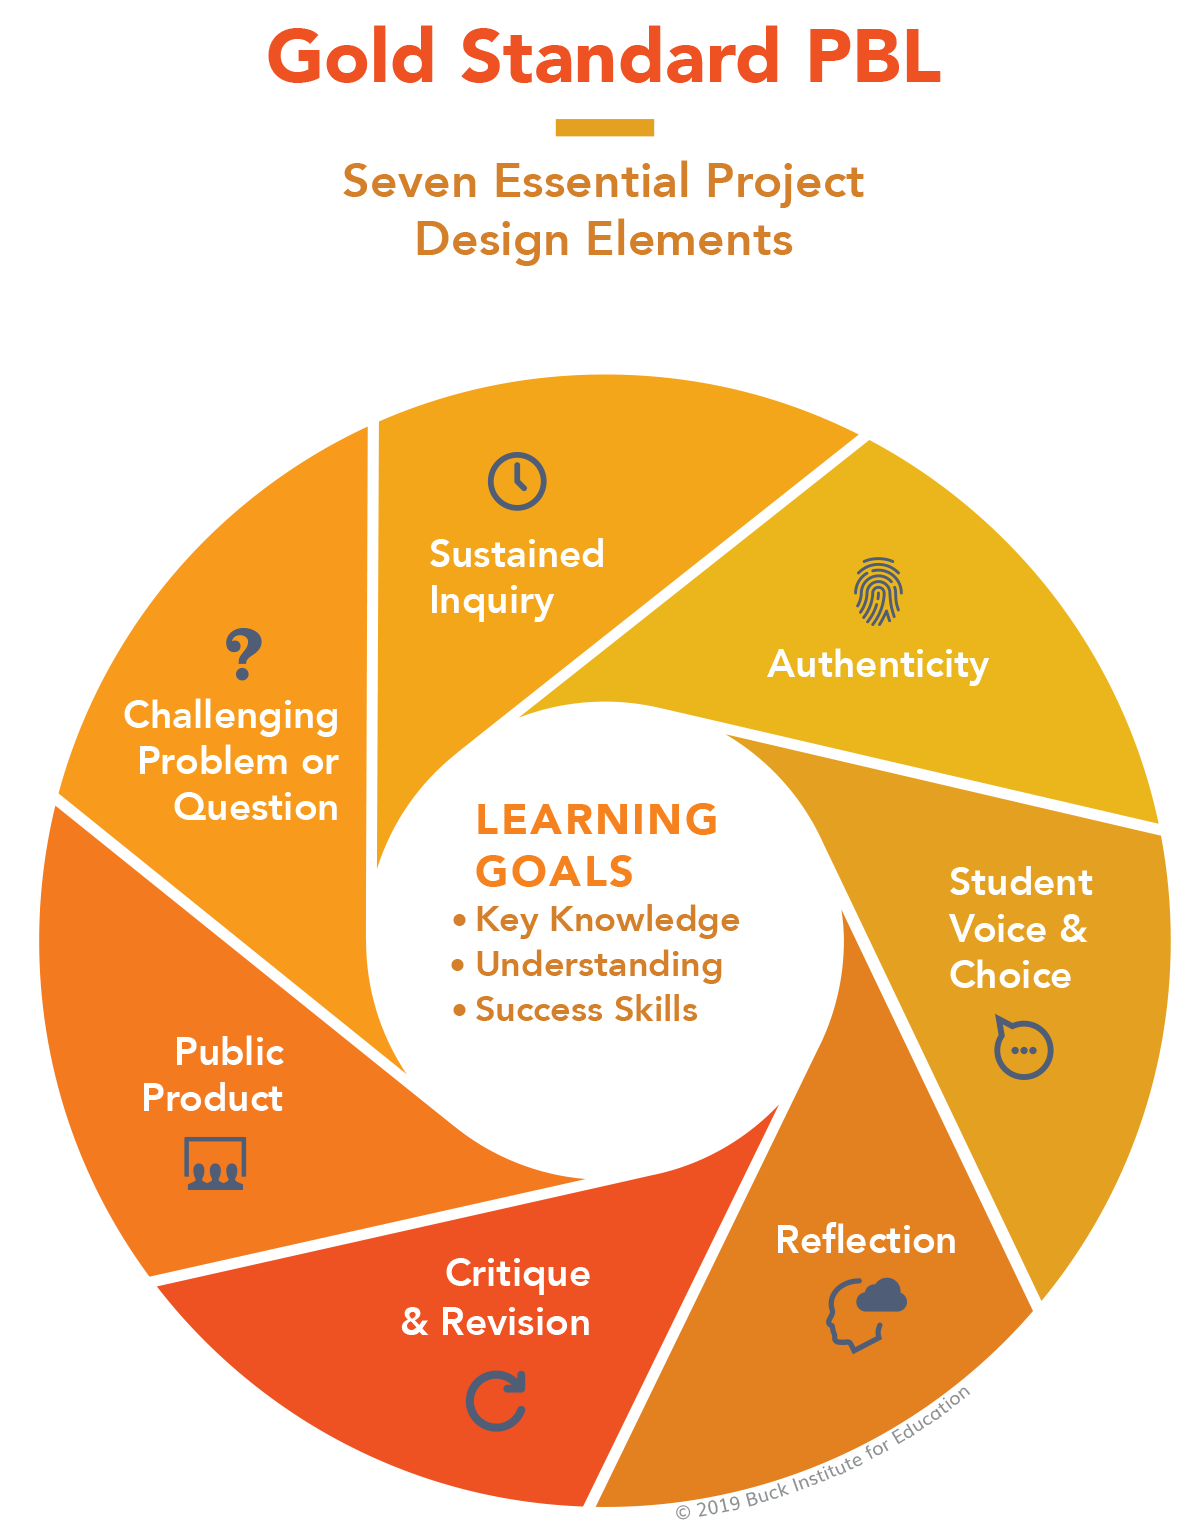
A quality PBL experience requires seven essential elements.
- Challenging Problem or Question: The project is framed by a meaningful problem to be solved or a question to answer, at the appropriate level of challenge.
- Sustained Inquiry: Students engage in a rigorous, extended process of posing questions, finding resources, and applying information.
- Authenticity: The project involves real-world context, tasks and tools, quality standards, or impact, or the project speaks to personal concerns, interests, and issues in the students' lives.
- Voice and Choice: Students make some decisions about the project, including how they work and what they create.
- Reflection: Students and teachers reflect on the learning, the effectiveness of their inquiry and project activities, the quality of student work, and obstacles that arise and strategies for overcoming them.
- Critique and Revision: Students give, receive, and apply feedback to improve their process and products.
- Public Product: Students make their project work public by explaining, displaying, and/or presenting it to audiences beyond the classroom.2
Microcontrollers
In this project, students will learn about microcontrollers (micro:bit), explore the basics of programming, participate in design challenges, build a moisture sensor and water pump, and make a video about their product.
Microcontrollers (micro:bit) are tuny computers that make coding tangible and promote digital creativity. The user creates a program to tell it what to do using one of the online code editors and then downloads it to a computer as a .hex file—a version of the program that the micro:bit can read.
Micro:bit is the microcontroller used for this plan. There are many other microcontrollers used in classrooms and prototyping such as Arduino and Raspberry Pi. The micro:bit is inexpensive, easy to use, and a great gateway into the world of computer science.
Micro:bit can be programmed in a variety of ways but most easily using micro:bit makecode. It is easy to get started with micro:bit using these tutorials or videos on YouTube such as the Micro:bit Tutorial Series.
The following resources provide information about microcontrollers (micro:bit):
Career HighlightsThis PBL plan introduces students to the following career opportunities: greenhouse operator, industrial designer, video editor, marketing specialist, coding/programmer, mechanical engineer. Explore the career profiles to discover job outlooks, education requirements, and average salaries. |
Engage
At the beginning of the project, students are introduced to key content using a compelling situation that provides context and serves as a catalyst for an authentic problem or challenge. In Project-Based Learning (PBL), this authentic problem/challenge is referred to as an "Entry Event." Students use the Entry Event to initiate inquiry by reflecting on their prior knowledge of the key content, generating questions that they need to know the answers to in order to successfully complete the project or process that will solve the problem, and identifying what their next steps might be to answer their questions. These questions are used in an ongoing way throughout the project to track learning and guide inquiry.3 While students may have several questions, one driving question needs to be agreed upon that, when answered, should address the initial situation. Refer to Milestone 1 for Entry Event procedures.
Explore and Explain
In PBL, projects are organized into milestones. Each milestone represents a significant stage of the project. Click on each milestone below to access instructional procedures.
- Milestone 1: Entry Event (approximately 1 day)
- Milestone 2: Computational Thinking (approximately 2 days)
- Milestone 3: Product Design and Development (approximately 4 days)
- Milestone 4: Final Presentation (approximately 3 days)
Sources
Moisture Sensor and Watering Mechanism Photo Credit: https://makecode.microbit.org/projects/plant-watering